Showing posts with label recycled Christmas card. Show all posts

Wednesday, December 29, 2010

Projects using greeting cards

Here are some of the ways that I have played with using greeting cards as craft supplies. Sometimes I recycle cards and sometimes I use new ones. You can click on the picture to visit the blog page about that project.

Gift boxes
Photobucket

Three sided wraps
Photobucket

Birdhouse Ornament
Photobucket

Village Ornaments
Photobucket

Double Ball Ornaments
Photobucket

Ornaments with "fins"
Photobucket

Double hearts (and ribbon trees)
Photobucket

Quick experiments
Photobucket

Photobucket

These card balls are usually done with greeting cards but I used used heavy paper instead.

Photobucket

Here are some projects that I would like to try using greeting cards. (If you click on the picture you will be taken to the page where I found the project.)

Trees

Photobucket

Woven stars and snowflakes

Photobucket


Photobucket Pinwheel 2010

Wednesday, December 22, 2010

Some other greeting card projects

I didn't have long to play with these greeting card projects.

The first were based on some tree place cards that I had seen on Martha Stewart's site. They were made from a printable hexagon pdf. My first trial was a red tree made from a hexagon cut from a five inch wide card. I found that it sprawled too much at the base so I made the second one, the green one using a octagon from cut from a 5 inch wide card.

Photobucket

It was a bit better but it still sprawled a bit more than I wanted it to.

Photobucket

My solution was to invert the card into a glass ...

Photobucket

...and to drip a small amount of white glue into the tree.

Photobucket

The red one was bigger on the base so I didn't try to squish it into the glass but I did set something on top to keep it evenly in the glass for the hours and hours it took the glue to dry. I think that I'll come back to this project some day. In the meantime I should at least add some stars to the hanging strings.

Photobucket

I also did quick trials of a couple of other strip projects.

Photobucket

The star is based on a folding star book design that I saw online. I quite liked how my little star turned out and I will someday try making this one with the front of a greeting card. It is the smallest of all the greeting card ornament projects I played with this month, it is only about 1 and 3/4 inches across, but it needs the longest strip of card stock. The inside star is made from a 7.5 inch long strip accordion folded in 10 sections each 3/4 of an inch long. (The middle star has 11 sections each 5/8 inches long and the outside star has 11 sections each 1/2 inch long.)

Photobucket

I'm not so sure if I'll try the oval one again. The original ones I saw were made of soft paper and the concave and then convex curves enhanced the shape of the ornament. Rendered in white card stock mine reminds me of an onion! Perhaps fewer strips with different proportions might for a more pleasing greeting card ornament.

Photobucket

Sunday, December 19, 2010

Greeting Card Heart (and ribbon tree) Ornaments

Photobucket

In my continuing quest to justify saving greeting cards as craft supplies I thought I would see if I could make a four strip heart from greeting cards.

In order to fit the strips on a greeting card I had to cut them smaller than the ones that I had seen. All of my strips are one inch wide. Two are 6 inches long and two are four inches long.

Photobucket

Because I wanted to use double sided tape or glue, not staples, to hold my ornaments together I scored a line 3/8 of an inch from one end of each strip.

Photobucket

On the front side (coloured side) of one of the long strips I covered about 1 and 1/2 inch of the unscored end with double sided tape. Then I folded my 9 inch hanging string and centred it on the double sided tape.

Photobucket

I placed the other long strip, front side down, on the strip with the glue and pressed the two strips together. .

Photobucket

I folded the scored ends of the long strips.

Experience told me that I should "condition" the shorter strips so that they would roll rather than fold when I bent them. To do this I gently rolled them onto an empty thread spool that was about 3/4 inch in diameter.

Photobucket

Then I folded the scored end and placed double sided tape on the other ends.

Photobucket

Next I stuck the two short strips to the longer strips.

Photobucket

I used more double sided tape to stick the scored end of the short strips to the other end.

Photobucket

Finally I used more double sided tape to stick the scored end of the long strips to the base of the heart.

Photobucket

Note. If I hadn't had any double sided tape I would have used a fast drying glue and at each step I would have pressed the glued sections together with clothes pins until the glue was dry.

Photobucket

Second Note. The card stock paper used for my second heart was a little thinner than the card stock in the first heart. I found that the shorter strips were less inclined to crease than for the first heart. I probably should have made the strips for the first heart (thicker card stock) a little longer.

Photobucket

When I laid out two of these ornaments like this I had another thought.

Photobucket

If I used a different coloured cards and added one or two more strips...

Photobucket

... I could make an ornament that looks like a Christmas tree.

So days later I gave it a try. Because the third loops would be too long to cut from greeting cards I decided to use corsage ribbon instead. And since I was no longer limited by the size of the cards I could make each of the three hearts from a single piece of ribbon. The ribbon is 1/4 inch wide and I cut three pieces. They are 8 inches, 12 inches and 16 inches long. I folded each one at its midpoint ...

Photobucket

... and tucked them inside each other so that the folds were together, the smallest one was on the inside and the largest one was on the outside.

Photobucket

Then I tucked the loose ends of the shortest then next longest then longest ribbons into the centre to make three hearts.

Photobucket

The ribbon was very springy so I applied glue to the inside surfaces and then held it together with a clothes pin until the glue was dry.

Photobucket

Then I glued two sequins to the outside and used a needle to thread my hanging thread through the sequins.

Photobucket

Then I tried it again but with some wider, and greener, grosgrain ribbon. This ribbon was much less springy and I was able to skip the glue. Instead I temporarily stuck some pins through the layers until I had sewed the buttons in place. (I wish I had a couple of slightly smaller white buttons.)

Photobucket

It was only when I had the two tree side by side that I notice that I had cut the longest green ribbon a little shorter than I had intended. It is only 14 inches long.

Photobucket

Photobucket
Pinwheel 2010

Wednesday, December 15, 2010

Recycled Greeting Card Ornaments

Photobucket

I have long wondered if I could use greeting cards to make the type of ornaments I think of as "ornaments with fins." For my first attempts I thought that I would enhance the standard ball shaped ornament with a more Victorian shaped base. (Click here for my pdf pattern for these ornaments.) I was a bit sceptical about whether the fins could be done with something as stiff as greeting cards so for the first ornament I compromised a little bit. For the base I used two rectangular pieces cut from the back of a greeting card. I glued them together and when they were dry I cut out my ornament shape. For the "fins" I used 1 and 3/4 inch circles cut from some wallpaper scraps. I used 5 on each side.

Photobucket

Surprisingly I discovered that the fins were inclined to flatten against the base so I improvised and used a needle and thread to add some beads to act as spacers.

Photobucket

After that the ball had a nice round shape and I was delighted to discover that the blue ball appears to be centred in a circle cut from the white base.

Photobucket

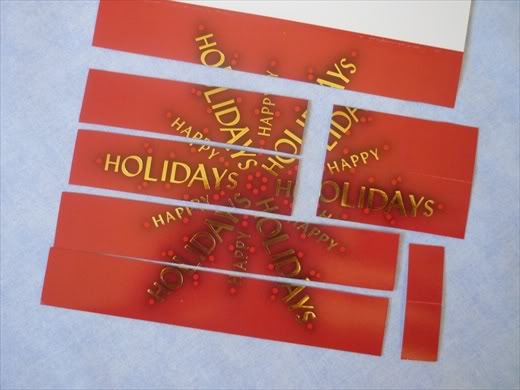
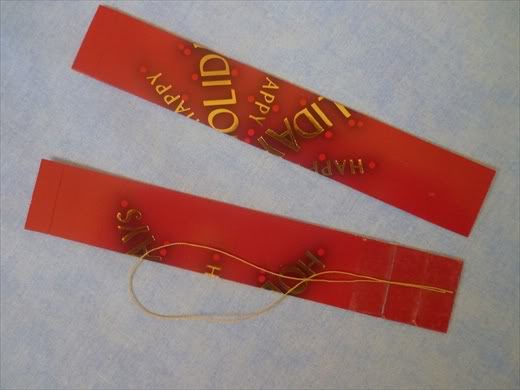
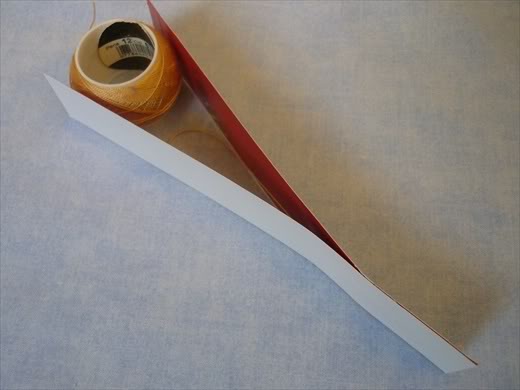
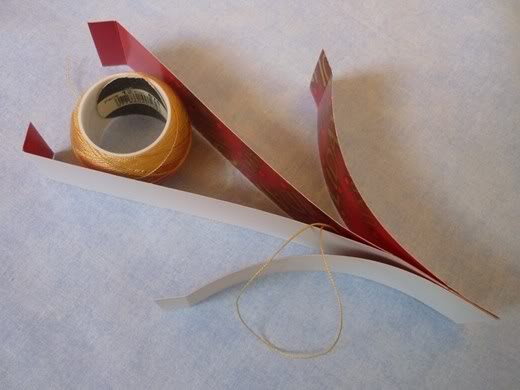
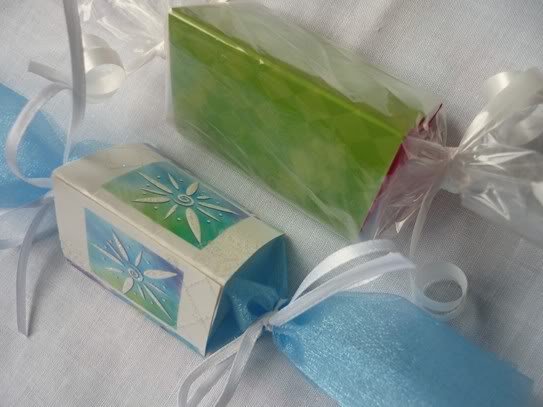
After that successful experiment I was ready to try again using only a greeting card. I was drawn to a contemporary card with a strong colour palette. The printed area on this card was only about 4 x 6 inches so I had to plan ahead to fit the two base shapes and two circle shapes on the front of the card. I cut four circles from the back of the card and scored the centreline of each circle. (I had already glued the two base shapes together before I took this photo.)

Photobucket

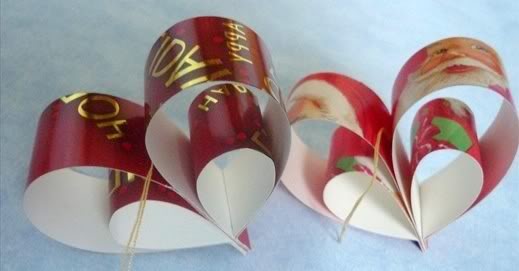
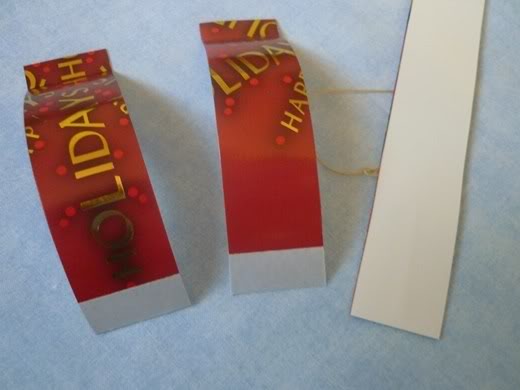
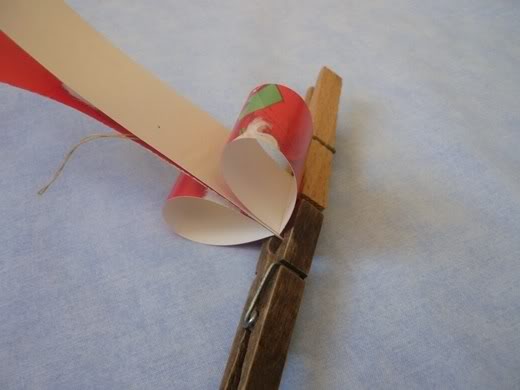
I glued two white circles to the back of each of the two printed circles. I was pleased that, unlike the wallpaper circles, these card stock circles didn't want to flatten out.

Photobucket

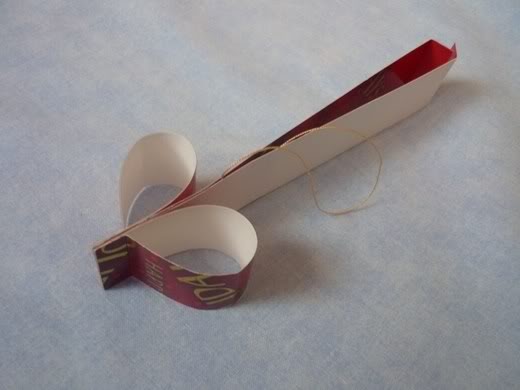
I had planned to place the axis of the ball on the vertical centre of the ornament but something, perhaps the boldness of the colour scheme, "compelled" me to place it on a rakish 45 degree angle instead.

Photobucket

In order to get the "ball spinning in the centre effect" I had to make sure that the two sets of circles shared the same axis. This meant that when I placed the circles on the second side I had to place their axis at the opposite angle as the ones on the first side.

Photobucket

Photobucket

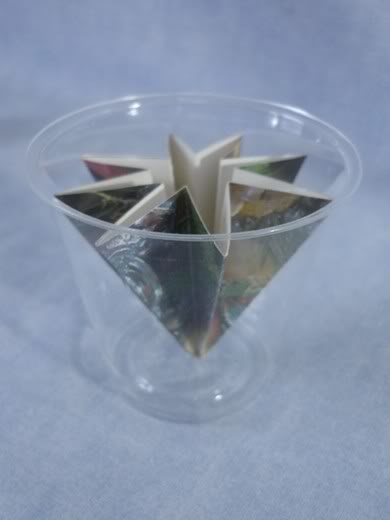
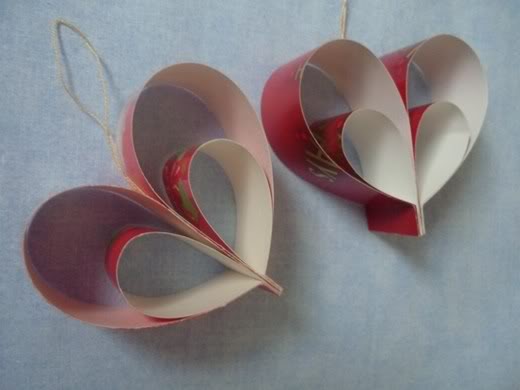
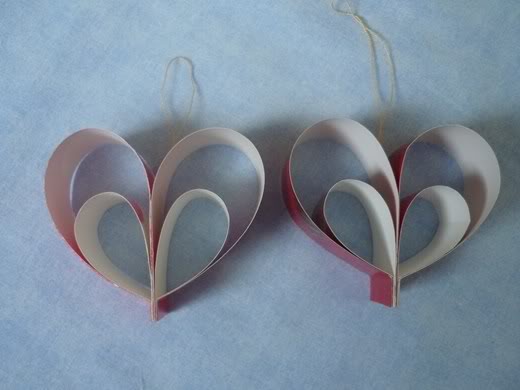
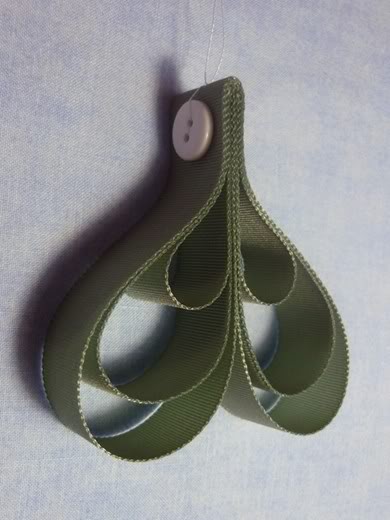
So this is what the ornament looked like when I had garnished it with ribbon.

Photobucket

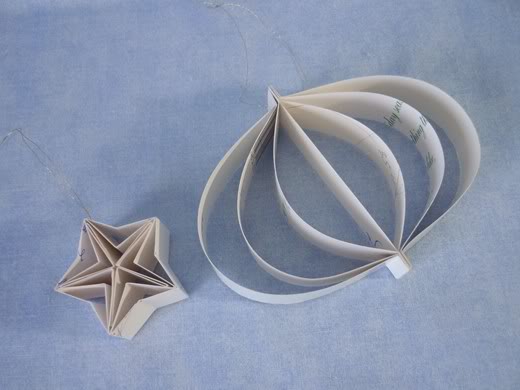
I was very pleased with how the card stock "fins" held their position so next I made a completely Victorian shaped ornament from recycled greeting cards.

I didn't have a single card large enough to allow me to cut 6 ornament shapes from the front. I did have a nine inch long card which would allow me to cut 3 shapes from the front and 2 from the back. Because of the printing on the back I decided that I wouldn't cut the third shape from the back of this card, I cut the third shape from the back of another card. I cut the cards into rectangle that were each three inches wide.

Photobucket

On my first card ornament I had cut my ornament shape through two layers at once. On the second one I had to glue the two shapes together and then finely trim them to match. The former method was easier and neater. I decided to see if I could make this whole ornament by cutting the shapes through two layers at once. I scored each rectangle down the centre and then creased them.

Photobucket

I glued (with liberal use of a glue stick) two white rectangles to the back of a green one and two green rectangles to the back of a white one. Then I flattened the centre rectangles and placed the two sections under a book until the glue was dry.

Photobucket

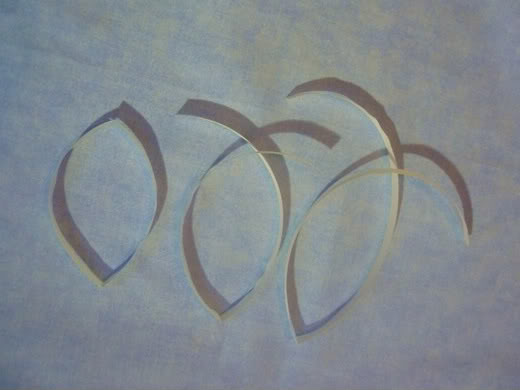
After the glue was dry I traced my ornament shape onto the centre rectangles.

Photobucket

Then, cutting just inside the line and through only two layers, I cut out one of the ornament shapes. (At the top and the bottom I did cut away a tiny bit of the third layers, just to make it easier to cut away the centre sections.) Then I cut out the other other ornament shape.

Photobucket

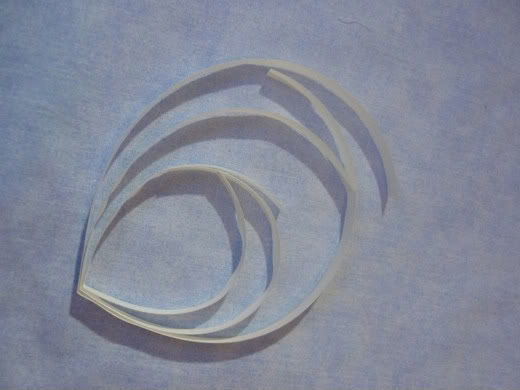
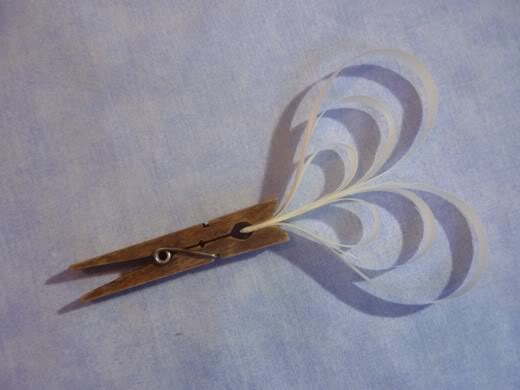
I flipped one of the sections over and taped the hanging ribbon to the back. (I made sure that I taped each end separately.)

Photobucket

Then I glued the two sections together, making sure that the top and bottom of one ornament section aligned exactly with the top and bottom of the other. (I ignored the top and bottom of the rectangles.) I placed them under a book until they were dry.

Photobucket

After the glue was dry I used one of ornament shapes that I had already cut out to trace the pattern onto the remaining rectangles.

Photobucket

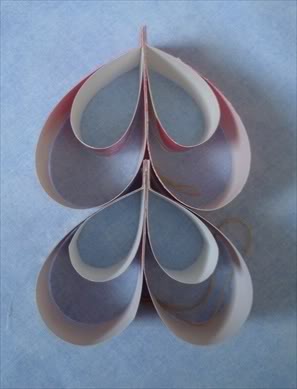
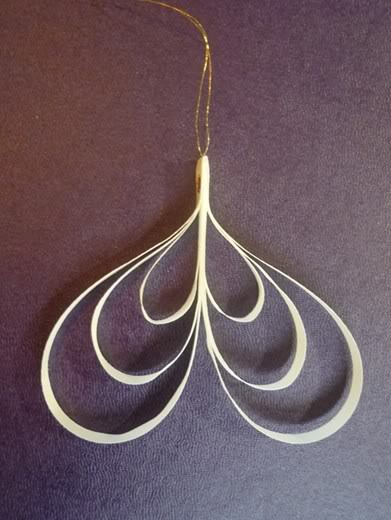
Then I cut just inside my lines, taking care to keep the ribbon out of the way. When I was done I needed to trim the base of the ornament so it was a bit tidier. And, probably because I had been moving the ribbon around, the top of the ornament was not firmly glued. I used a toothpick to add some glue to the inside and pressed it back together. And then the ornament was complete.

Photobucket

Photobucket

Hmmm. When I look at it from this angle it looks something like a pear ...

Photobucket

Photobucket
Pinwheel 2010