Showing posts with label paper strip ornament. Show all posts

Wednesday, December 29, 2010

Projects using greeting cards

Here are some of the ways that I have played with using greeting cards as craft supplies. Sometimes I recycle cards and sometimes I use new ones. You can click on the picture to visit the blog page about that project.

Gift boxes
Photobucket

Three sided wraps
Photobucket

Birdhouse Ornament
Photobucket

Village Ornaments
Photobucket

Double Ball Ornaments
Photobucket

Ornaments with "fins"
Photobucket

Double hearts (and ribbon trees)
Photobucket

Quick experiments
Photobucket

Photobucket

These card balls are usually done with greeting cards but I used used heavy paper instead.

Photobucket

Here are some projects that I would like to try using greeting cards. (If you click on the picture you will be taken to the page where I found the project.)

Trees

Photobucket

Woven stars and snowflakes

Photobucket


Photobucket Pinwheel 2010

Sunday, December 19, 2010

Greeting Card Heart (and ribbon tree) Ornaments

Photobucket

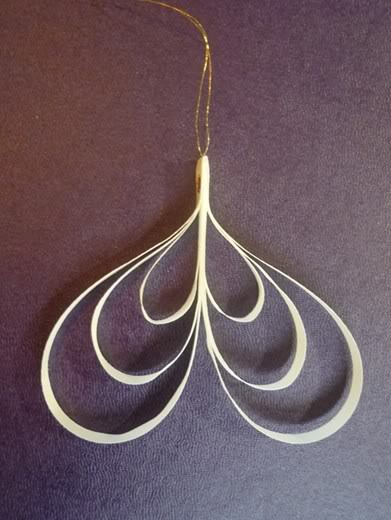
In my continuing quest to justify saving greeting cards as craft supplies I thought I would see if I could make a four strip heart from greeting cards.

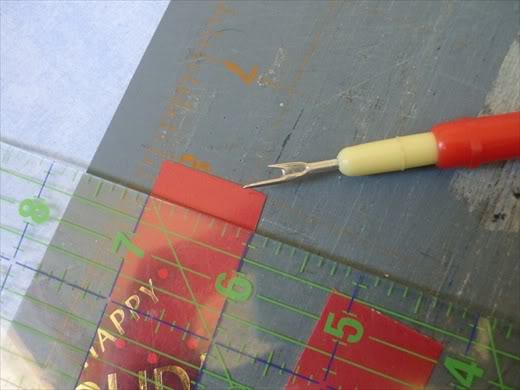
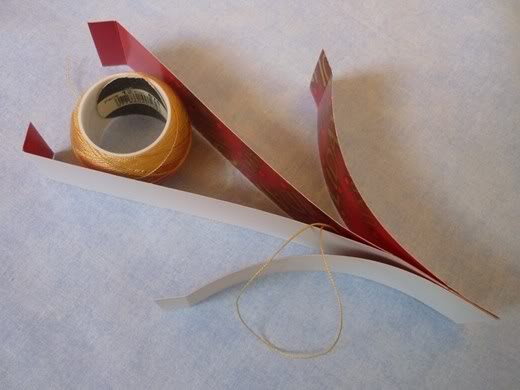
In order to fit the strips on a greeting card I had to cut them smaller than the ones that I had seen. All of my strips are one inch wide. Two are 6 inches long and two are four inches long.

Photobucket

Because I wanted to use double sided tape or glue, not staples, to hold my ornaments together I scored a line 3/8 of an inch from one end of each strip.

Photobucket

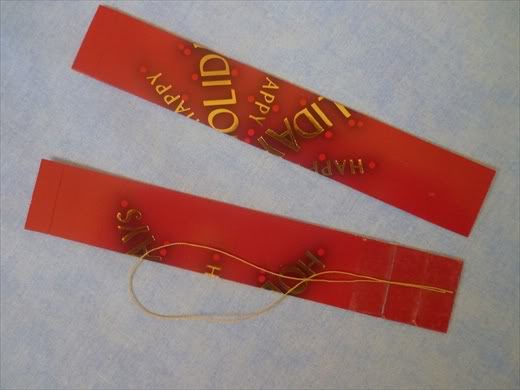
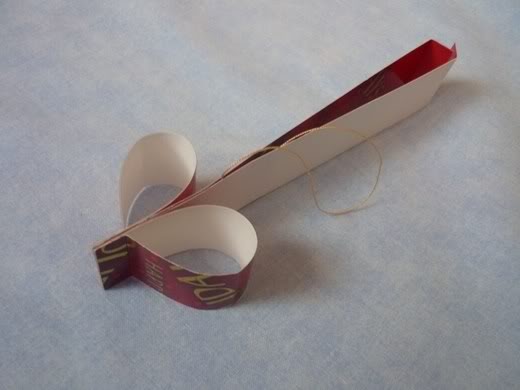
On the front side (coloured side) of one of the long strips I covered about 1 and 1/2 inch of the unscored end with double sided tape. Then I folded my 9 inch hanging string and centred it on the double sided tape.

Photobucket

I placed the other long strip, front side down, on the strip with the glue and pressed the two strips together. .

Photobucket

I folded the scored ends of the long strips.

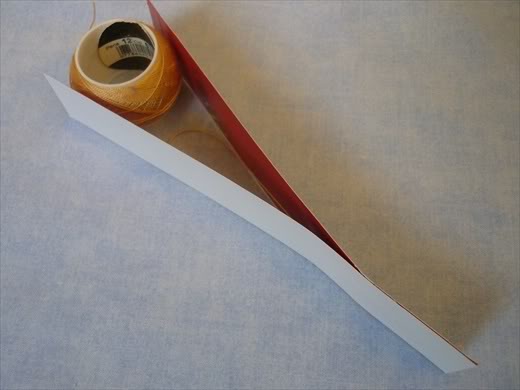
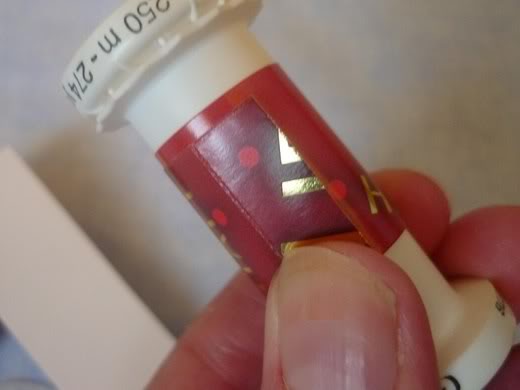
Experience told me that I should "condition" the shorter strips so that they would roll rather than fold when I bent them. To do this I gently rolled them onto an empty thread spool that was about 3/4 inch in diameter.

Photobucket

Then I folded the scored end and placed double sided tape on the other ends.

Photobucket

Next I stuck the two short strips to the longer strips.

Photobucket

I used more double sided tape to stick the scored end of the short strips to the other end.

Photobucket

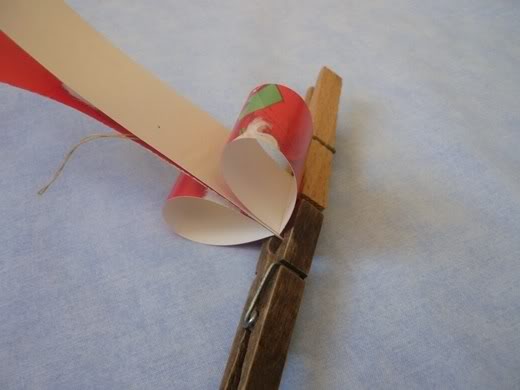
Finally I used more double sided tape to stick the scored end of the long strips to the base of the heart.

Photobucket

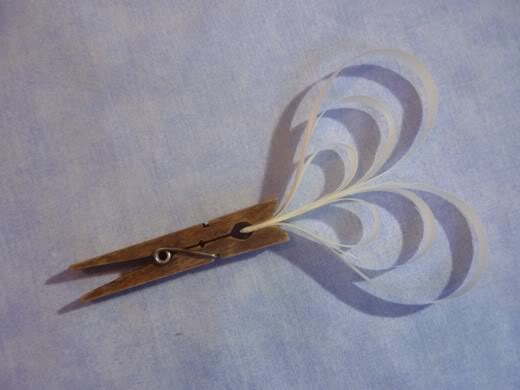
Note. If I hadn't had any double sided tape I would have used a fast drying glue and at each step I would have pressed the glued sections together with clothes pins until the glue was dry.

Photobucket

Second Note. 
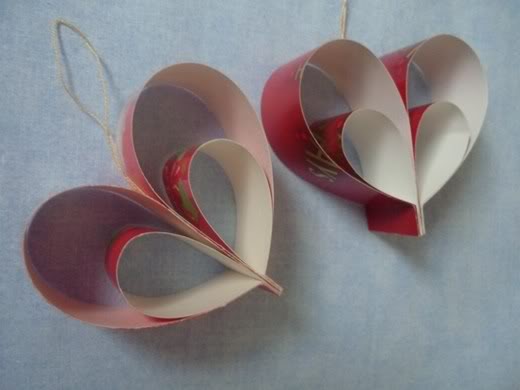
The card stock paper used for my second heart was a little thinner than the card stock in the first heart. I found that the shorter strips were less inclined to crease than for the first heart. I probably should have made the strips for the first heart (thicker card stock) a little longer.

Photobucket

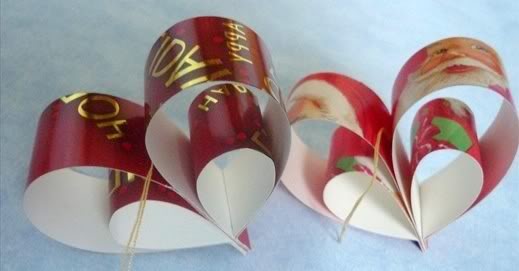
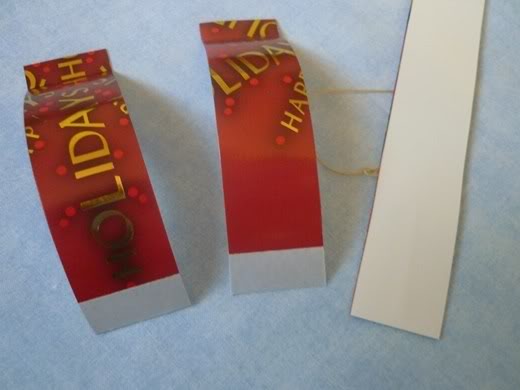
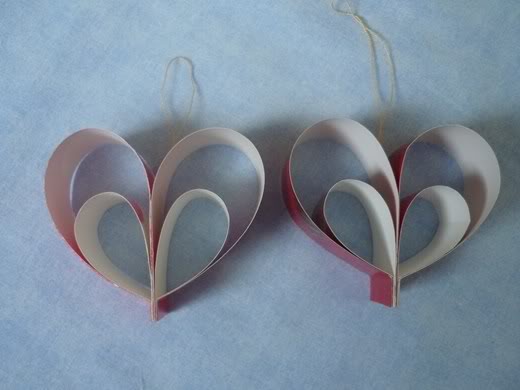
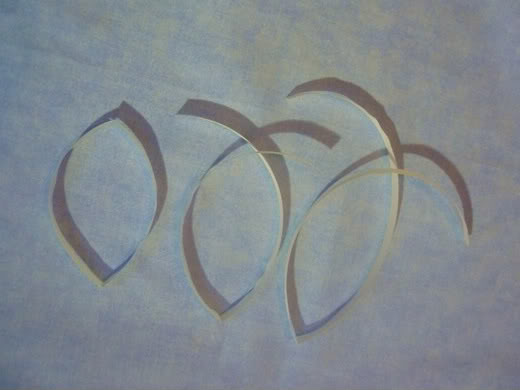
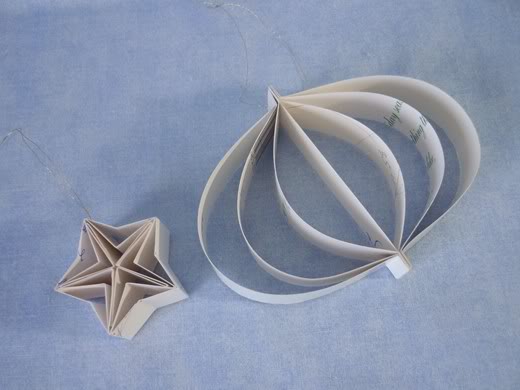
When I laid out two of these ornaments like this I had another thought.

Photobucket

If I used a different coloured cards and added one or two more strips...

Photobucket

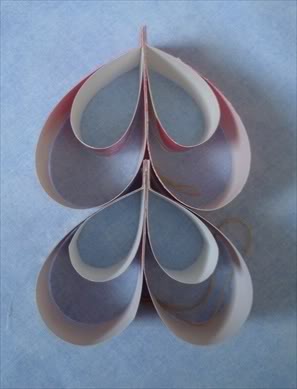
... I could make an ornament that looks like a Christmas tree.

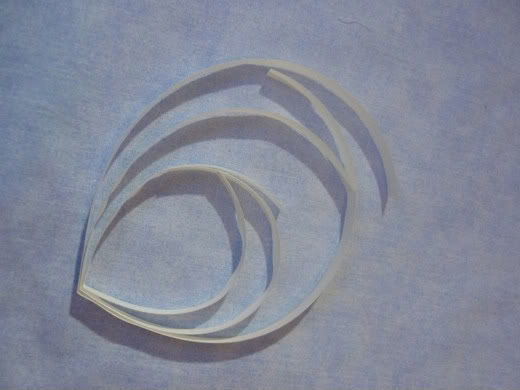
So days later I gave it a try. Because the third loops would be too long to cut from greeting cards I decided to use corsage ribbon instead. And since I was no longer limited by the size of the cards I could make each of the three hearts from a single piece of ribbon. The ribbon is 1/4 inch wide and I cut three pieces. They are 8 inches, 12 inches and 16 inches long. I folded each one at its midpoint ...

Photobucket

... and tucked them inside each other so that the folds were together, the smallest one was on the inside and the largest one was on the outside.

Photobucket

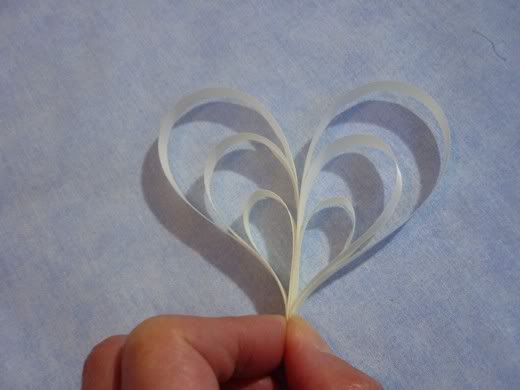
Then I tucked the loose ends of the shortest then next longest then longest ribbons into the centre to make three hearts.

Photobucket

The ribbon was very springy so I applied glue to the inside surfaces and then held it together with a clothes pin until the glue was dry.

Photobucket

Then I glued two sequins to the outside and used a needle to thread my hanging thread through the sequins.

Photobucket

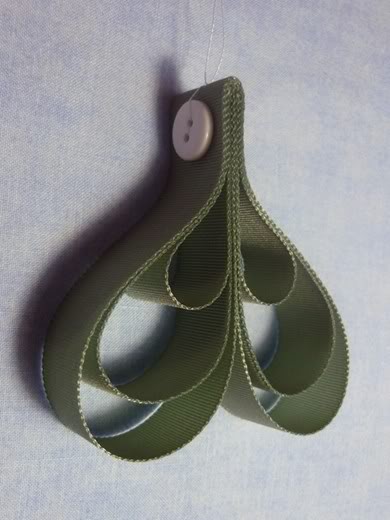
Then I tried it again but with some wider, and greener, grosgrain ribbon. This ribbon was much less springy and I was able to skip the glue. Instead I temporarily stuck some pins through the layers until I had sewed the buttons in place. (I wish I had a couple of slightly smaller white buttons.)

Photobucket

It was only when I had the two tree side by side that I notice that I had cut the longest green ribbon a little shorter than I had intended. It is only 14 inches long.

Photobucket

Photobucket
Pinwheel 2010

Friday, December 10, 2010

Double ball ornaments

Photobucket

I've been itching to see if the double ball ornaments, demonstrated in the following two videos,

http://www.youtube.com/watch?v=3sIjt8ulWHc
http://www.youtube.com/watch?v=EfXF6k2SvBY

could be done using recyled Christmas cards. I didn't have any hatpins (and few other interesting trimmings) and for my first attempt I picked a somewhat bland card. I alternated strips from the front of the card with strips from the back of the card. In lieu of a hat pin I used a pearl bead that had a long wire stem. I began with the bottom ball and when I finished threading on all the strips and beads I bent the end down into the bead to make a loop for the hanger. This is the result.

Photobucket

Photobucket

I discovered that the stiffness of the card stock means that the strips, especially on the smaller ball, tend to want to fold instead of roll. I think that I can precondition them so that they will roll but before I tried this on some more colourful cards I thought that I would experiment using some ribbon instead.

I don't have a lot of wide ribbon but I did find some vinyl velvet ribbon that was very easy to cut into 1/2 inch strips. For this ornament I used a double thickness of thread, instead of a hat pin, to make the axis of the ornament. Using a needle and thread was a lot faster than threading card stock strips on the wire, and I didn't need to punch any holes in advance.

Photobucket

The one thing that I didn't like about this ornament is that, because of the order that the strips are added, there is a beginning and end point where the 12 layers of ribbon hold the top and bottom ribbons far apart. This is especially noticeable because the velvet ribbon is so thick.

Photobucket

So I decide to do another experiment using ribbon, but altering the order that the ribbon is added. In the two above ornaments I alternated the two colours of paper/ ribbon. This time I put all of one colour of ribbons on first and then added the strips of the other colour. I arranged the ball with the strips that were put on first on the outside of the ball. I discovered that when one does this it is desirable to make the inside loops a little longer than the outside loops so that they keep the loops from shifting position. I'll know better next time but in the meantime I liked the look of this little ornament.

Photobucket

And now I think that I'll take the two ribbon balls apart and make the first one the second way and the second one the first way. After all the ribbon of the second ball is so thin that even 12 ribbons won't stack up very thick...

The next day

Well I took them apart and redid them. The yellow one worked well. As I suspected the stack of ends is negligible. For the velvet one I discovered that I needed to make the ribbons of the inside loops narrower so they could fit between the outside loops. The inside ribbon is now only 1/4" wide.

Photobucket

Though there are just as many ends as before they are now inside the ornament, not stacked between the two balls. This makes for a much smaller gap between the two balls. And now it occures to me that for this style of ornament I can use loops of ribbons twice as long (four inch and six inch) and there would be even fewer ends. Hmmm...

Later that week ...

I dug deep into my craft supplies and found some more appropriate embellishments so I decided to experiment a little more. For both these ornament I started with the beads and bead caps that make up the base of each ornament, added the smaller ball, the larger ball and finally the bead caps and beads that make the top of each ornament. I made the yellow and white one with the short pieces of ribbon (2 inch and 3 inch) and assembled it as shown in the you tube videos. (So each ribbon appears to swirl from under the adjacent ribbon.)

Photobucket

For the blue one I found some 1/4 inch white ribbon to alternate with the blue velvet. I cut all the ribbons twice as long (4 inch and 6 inch) and trimmed about an 1/8 of an inch from the blue ones. (Because they were all going to be on the outside.) Then I made a loop of each ribbon, overlapped their ends by about 1/4 inch and glued them together. When I added the loops I did so in such a way that the very top and very bottom loops did not show this overlap. (For the bottom ball I poked the needle in the first loop through the centre of the loop and for the top ball I poked the needle in the first loop through the overlapped section.) I also alternated the placement of the ribbon so that half the overlaps are on the top of the ball and half are on the bottom of the ball.

Photobucket

For both of these ornaments I used a gold coloured thread. To make the ornaments a little stiffer, and to help maintain the distance between the top and bottom of each ball, I threaded several gold bugle beads onto the thread in the middle of each ball. (I wish that I had one very long bugle bead that I could cut to the required lengths!)

I found that the slippery ribbons of the yellow and white ball were reluctant to stay in place on the bigger ball so I applied a little glue to the underside of the organza flower and pressed it against the top of the ball.

Photobucket

When I finished these two ornaments I redid the burgundy and blue one using the metal bead caps and pearl beads.

Photobucket

Photobucket
Pinwheel 2010