To make the cording I used 4 lengths of 6 strand floss. I wanted about 6 inches of twisted cord for each seam and tassel but I added one inch for "shrinkage". I measured out 56 inches of 6 strand floss (4 lengths times seven inches times 2) and added a little more (for the knot) before I cut it. I knotted the ends together, made the loop into a figure eight and folded it in half.

I inserted a bamboo skewer (a knitting needle works well too) through the loop near the knot and clipped a pen at the other end of the loop. (I sometimes use an electric mixer to make cording but it wasn't worth the trip to the kitchen for just three short pieces.)
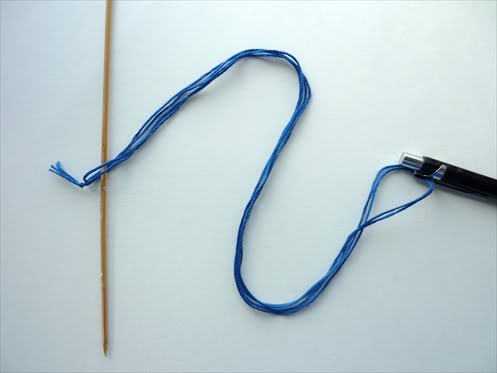
I put the two ends of the skewer under my two feet, held the pen upside down, pulled the threads tight and began to twist. After I had twisted the pen about 50 times the thread wanted to double up when I eased the pen toward the skewer. I pulled the pen up again and gave it 10 more twists for good measure. Carefully holding the center of the twisted thread with one hand I brought the clip of the pen down to the skewer. Only then did I allow the thread to twist on itself. With a bit of tugging and twisting it looked soon like this:
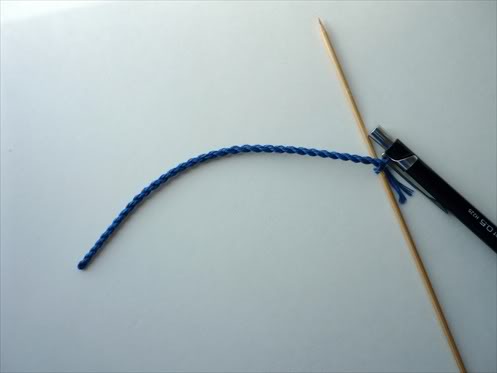
To keep the cording from untwisting too much I replaced the skewer and pen clip with a safety pin. (A paper clip works well too.) I repeated this procedure to make two more pieces of twisted cord.

As I said above, when I have a lot of cording to do I use my hand held mixer and a paper clip to achieve the same thing. (I was glad for the mechanical assistance when I twisted the 84 thin cords I used to make the 21 white tassels for my multifaceted ornaments.) Other people use the bobbin winder on a sewing machine, as shown on this youtube video. Or a special tool, as shown on this youtube video.
Next I twisted a single strand of floss to make a corded thread for the ornament hanger. (I tied one end to the skewer but I just used my fingers to twist the thread.)

I threaded the hanger thread through a tapestry needle and threaded the tapestry needle through the loops at the folded ends of the three pieces of twisted cord.

I adjusted the hanger thread so that it was centered on the loops and made a knot to draw them together.

To keep the hanging thread more to the center of the ornament I threaded the two ends into the tapestry needle and threaded the needle up between the three looped ends. I removed the needle and tied the two ends of the hanger thread together.

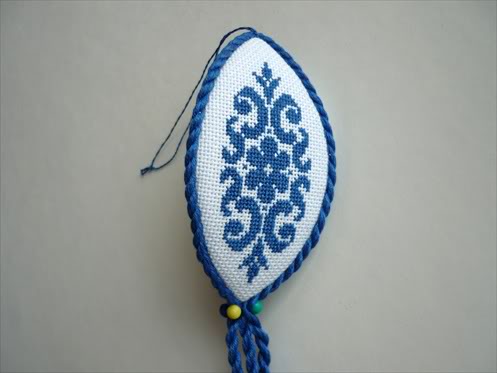
Then I was ready to attach the cording to the ornament. I stuck a pin down the hole where I had just threaded the hanger thread and pushed the pin into one end of the ornament.

Moving the three pieces of cording out of the way I used a toothpick to apply a small amount of white glue to about the top inch of one furrow between two of the ornament sections.

I gave one piece of cording a little twist to tighten it up, pressed it into the glue and stuck a pin through the cording and into the furrow little below where the glue ended. Any excess glue that showed around the cording was removed with with a clean toothpick. I repeated this procedure for the other two pieces of twisted cord and left it to dry.

When I returned I removed the pins then used a toothpick, white glue, and pins to attach about another inch of cording to the three furrows. (I didn't forget to give the cording a little twist before I pressed it into the glue.) Again I removed any excess glue and left it to dry.

When I returned I again removed the pins and used a toothpick, white glue, an extra twist and pins to attach the twisted cords to the furrows right down to the bottom point of the ornament. I checked for excess glue and left it to dry.
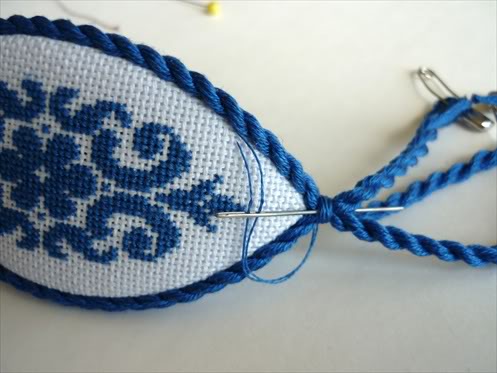
Finally I was ready to make the tassel. I took 20 inches of a single strand of floss, folded it in half and passed the ends through the loop to make a circle.

I removed the pins, threaded the ends of the three cords through the circle of thread and lifted the circle up snug against the bottom of the ornament. I pulled the circle tight, making sure that it was well centered on the bottom of the ornament and that all the cords were flat against the ornament.

Next I wrapped the two ends of the thread around and around the three cords until I had about four inches of thread left. I threaded the ends of the threads into a tapestry needle, inserted the end of the needle above the wraps and pushed it towards the center of the three cords.
I cut the loops at the safety pins...

...cut off the knots and gently untwisted the threads.

I used a clean moist face cloth to dampen the threads and then straightened them with a wide tooth comb. When they were straight and smooth I used a ruler and rotary cutter to cut the ends off straight and even.
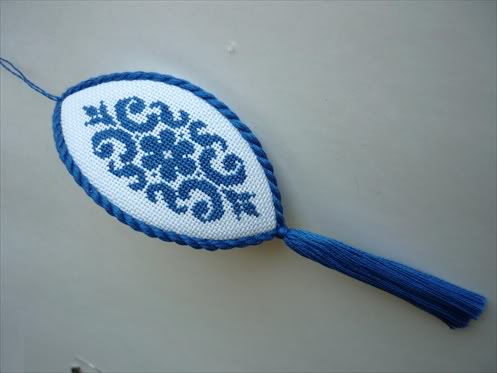
(Though, as usual, the angle of the photo makes them look anything but!)

Pinwheel


