
Since 1988 I have been making Seamingly Seamless Smocked Ball ornaments. In 2004 I published a website (freewebs.com/bonimoo) with illustrated instructions of my method. In the eight years since I have fine tuned many parts of my method so I have decided to create this updated tutorial.
Below is the tutorial. I also have another blog page that has more information about fabric choice, ball choice, thread choice, finding patterns, determining the length and width of the fabric strip, marking the fabric and embellishments to add to the top and bottom of the ball.
Cutting the fabric.
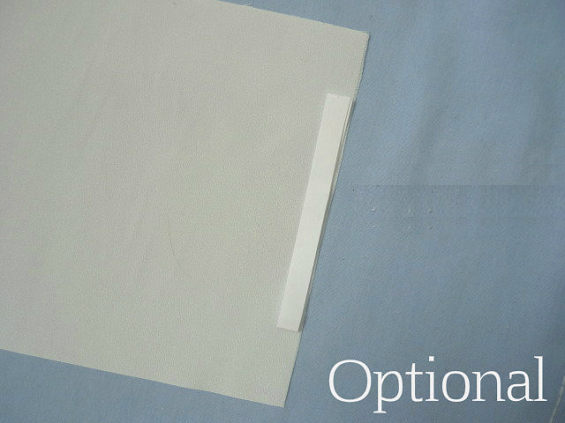
I didn't fuss with a tape measure to figure out the dimensions of my fabric strip. I just used a strip of paper to measure my ball. I marked the cross over spot with a pin,

and cut off the excess.

I cut a strip of fabric, on the straight grain of the fabric, approximately three times the length of my paper strip.

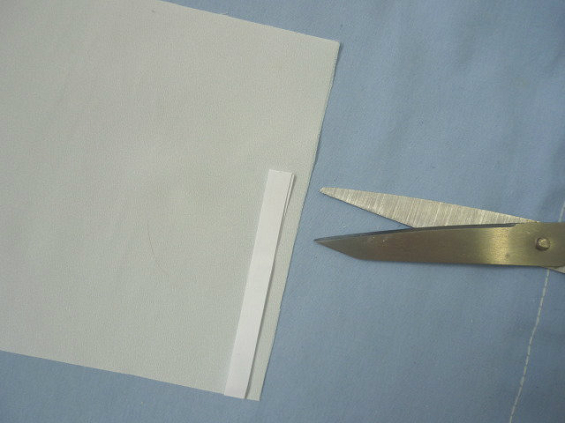
Then I folded the paper strip in half and snipped off about 3/8" of an inch.

Then I used the folded strip of paper to mark the correct width for my fabric strip.
If I was going wash the fabric later, to remove smocked dots or marking lines, I would have cut my strip wider than this measurement and then cut it to size after it was washed and dried.
Because I won't need to wash this fabric before smocking I used the folded paper strip to mark the desired height of my fabric strip.
I made a snip with my scissors, pulled on a thread,

and cut along the line to make my fabric strip.
Making the gathering lines.
I’m envious of people who have access to pre-pleated smocking fabric because hand gathering fabric is a tedious process. (If you have access to pre-pleated fabric you can skip the next bit and jump to Gathering the fabric to fit the ball. There isn’t much I can do to speed up the process of making the gathering lines but over the years I have discovered a couple of ways to make “marking” the gathering lines a little less tedious. For more detailed information visit my other blog page to see how I make and use printed grids to”mark” opaque and semi-transparent fabric when I make smocked balls.
The fabric for this ornament is semi-transparent so I was able to lay it directly onto my printed grid. I placed the center the fabric strip (right side down) onto the grid. My design had an uneven number of gathering lines so I placed the horizontal center of the fabric strip on a line of the grid. (If my smocking
design had used an even number of gathering lines I would have placed the horizontal center of the strip midway between two lines of the grid.)

I used long stitches to baste the fabric strip to the printed grid.

To make my gathering lines I used good quality thread. I like to use thread that matches the fabric for any gathering lines that won't be removed and thread that contrasts with the fabric for any threads that will be removed. I made a big knot in the end of the first gathering thread and inserted the needle from the right side of the fabric. (Between the printed grid and the fabric.) Then I made a small stitch, maybe 4 or 5 threads, at each intersection of the grid.

For this ornament I want 96 pleats so when I counted 96 long stitches I poked the needle through the fabric and the printed grid.

Then I made the other gathering lines. Since the top and bottom grid lines were more than 1/4 inch from the edges of the fabric I made additional gathering lines 1/8 inch from the edges of the fabric. When all of the lines were complete I removed the basting threads then lifted the fabric strip from the printed grid.

Gathering the fabric to fit the ball
In traditional smocking one gathers by gently pulling on pairs of threads until the pleats are gathered all the way to the knotted ends. Since I fit the fabric to the balls before smocking I like to gather the threads from both ends. I knotted two or three thread ends together. (If I had marked directly on the fabric, and it showed through to the right side, I would now wash, dry and trim my fabric to the desired width.)

I gathered the fabric by gently pulling on the sets of thread. When it was all snugged up it looked a quite rumpled. To straighten the pleats I held the fabric at the top and bottom and pulled, while gently wiggling the fabric to the left and right. I repeated this across the width of the gathered strip.

When I was done the pleats look much better. There were still a few bent pleats so,

I used the eye of a needle to comb the bent pleats, on the wrong side
and on the right side

When I was satisfied that every pleat was straight I cut the threads so that their total length was about 12 inches long.

Because I wanted to steam the pleats I drew the threads very tight, threaded each thread end onto the needle and made one small whip stitch at each thread end .


Traditionally people have used the steam from an iron to set the pleats. To steam my pleats I saturated the fabric with water, placed it on a microwave safe plate and heated it for about a minute.

When the fabric was dry I removed the whip stitches, moved all the gathering threads out of the way and trimmed the side edges to within about 1/4 inch of the threads.

Then I folded the fabric edges just beyond the last stitch and pinned the two edges together.

I used matching thread to ladder stitch the seam.

I then had a tube of pleated fabric.

I placed my styrofoam ball in the middle of the tube. Because I didn't want the seam allowance to get gathered up in the first couple of pleats I made sure that the seam was open and flat. Then I started a knot, just a left over right and under, in all but the first and last pairs of threads. I gently pulled on the
pairs of threads to loosely gather the fabric to the ball.

I threaded a needle with the gathering thread from the top right side and passed it through the top of the first few pleats on the left side of the seam, just above the existing gathering line.

I continued until I had stitched through the top of about half the pleats. Then I threaded the needle with the gathering thread from the left side of the seam and passed the needle through the top of the pleats to the right of the seam, until I reach the other thread end.

I repeated this step for the bottom end of the ball. Then I checked that the seam was still open and flat before I pulled the thread ends on the top and bottom into tight circles that lay flat on the ball. (If the fabric had been thicker or the strip had been longer it may have resisted pulling into a circle that would lay flat on the ball. In that case I would have removed the gathering threads closest to the edges of the fabric, trimmed about a 1/8 of an inch from the edges and gathered it again.) When the circles at the two ends were approximately the same size I knotted the thread ends together,

and cut them short.
Then I finished knotting the other pairs of threads (another left over right and under) and cut them to about 1/2 inch long.

I pinned buttons over the two ends to keep the fabric from fraying

Though it probably isn't necessary I like to distribute the pleats evenly around the ball. This time I had 96, or 4 x 24, pleats. So starting at the seam I placed a pin between every 24th pleat. I looked at the pins from the top of the ball. My objective was for the pins to look like the four points of a compass.

I used the eye of a needle to gently adjust the pleats so that they were distributed more evenly around ball.

I could probably have start smocking now but I was in a picky mood so I took a minute to check the distribution of the pleats. I made a new strip of paper, just long enough to wrap around the fabric covered ball. I folded and marked the paper into four equal parts.

Then I wrapped it around the ball to check the location of the pleats. If necessary I adjusted the pleats.

And then I decided to push short fine pins into the top and bottom of these marked pleats, so that they wouldn't shift excessively as I smocked the fabric.

Once I removed the other marking pins I was ready to smock.
Smocking the ball
Because I can't access the back of my fabric I need to hide my knots between the pleats.
If I was using two strands of embroidery floss I could use a loop start. To do so I would thread one end of a double length thread through the needle and make a tiny stitch on the left hand side of the first pleat. (Down in the valley a little.)

Then I would thread the other end of the thread through the needle, even up the thread ends,

and make my next stitch.

However, this time I was using a single strand of DMC perle #12 so I made an overhand knot near the end,

and cut off the excess.

I made a small stitch on the left side of the first pleat,

and continued on to my next stitch.

I continued smocking this first row and as luck would have it I ran out of thread before I made it back to the seam. I made my last stitch with this thread into a very long back stitch. I tunnelled the needle under several pairs of pleats and brought it back out between two pleats that had been narrowed by the
stitching.

I cut the end of the thread about 1/2 inch from where it emerged from the fabric.

I made an overhand knot in my next thread, cut off the excess and made a small stitch in the fabric between the pleats of the last stitch.

I used the eye of the needle to nudge the knot into the pleat and made my next stitch.

When I reached the seam I made my last stitch over the pleat where the first knot was anchored and brought the needle up ready to begin the next row of stitching.
I nudged the knot into the pleat and proceeded to smock the next row. (If the next row had required a different colour of thread I would have finished the first row with a long backstitch that emerged between two narrowed pleats.)

Then, in cooking show tradition, I switched to a ball that I had already smocked using white rayon embroidery thread. I was anxious to remove all the fuzzy threads that were sticking out from it but there were a few things I wanted to do first.

I wanted to sew on some beads, but I didn't want the thread to catch the gathering thread below, so I removed the gathering thread. To remove the gathering thread I used embroidery scissors to cut the thread about halfway around the ball,

and pulled on the thread ends at the seam.

After I sewed on the beads I wanted to wash the ball.

To wash the ball I removed the buttons and all of the pins (should have done that before I took the picture!) put it in a lidded plastic container of sudsy water, gave it a shake, let it soak for a bit, gave it another shake, rinsed it and left it to dry.
When it was dry I made some small adjustments to even up the spacing of the pleats and removed the rest of the gathering threads. Then finally I could remove the thread ends. I tugged gently on a thread end, cut it close to the fabric and watched it disappear from sight.
When all the ends were cut I had a seemingly seamless smocked ball. (Can you tell where the seam is?)

(Click here if you want to see which set of pleats flank the seam.)
Embellishing the ball
Finally I needed to cover the holes on the top and bottom of the ball with bows, or buttons or bead caps or tassels or ... For this one I chose a bead cap with some fabric gathered and stitched over it.


In September and October 2012 I made 18 smocked ornaments similar to this one and I used ribbon pansies and leaves to embellish the tops.
The first three.

And the final fifteen.

I blogged about this project at,
http://pinponpanpro2012.blogspot.ca/
Here is a collage of photos that shows some of the other ways I have finished the tops and bottoms of smocked ball ornaments. (Double click on the photo to see a larger view.)

And don't forget to visit my other blog page that has more information about fabric choice, ball choice, thread choice, finding patterns, determining the length and width of the fabric strip, marking the fabric and embellishments to add to the top and bottom of the ball.
 Pinwheel August 2012

Love your tutorial & beautiful pictures of each step!
ReplyDeleteThank you for your encouraging words Linda.
ReplyDelete:*)
Wow, that was incredible! I think it's the best tutorial I've ever seen! Your ornaments are beautiful!!!
ReplyDeleteThank you for your enthusiastic response Carolyn.
ReplyDelete:*)
Such clear instructions! And yes, your ornaments are breathtaking!
ReplyDeleteThank you Eileen!
DeleteI am new to smocking, you tutorial is clear and seems to be easy to follow. Thank You!
ReplyDeleteDeb
You are very welcome Deb!
DeleteBeautiful!!
ReplyDeleteOf all your ornaments, is this one my favorite?
ReplyDeleteQuite possible... though choosing a favorite is nigh on impossible.
Thank you for all your ponderings. One of life's perfect pleasures.
Dee
I have found some strips of smocked fabric that my deceased mother had started for smocked Easter eggs. They are not finished. Can I do your “seamless” method to finish them, or will I need to do it the other way?
ReplyDeleteCould you please be more specific regarding the bead cap. What size do you need? I really liked the one you covered. Thanks
ReplyDelete